L'écran de la brique
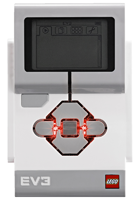
Cette page ne présente que les bases de l'utilisation de l'écran.
Préalable
Pour pouvoir programmer l'écran de la brique, il faut :
- importer la classe
EV3Brick, - initialiser un objet
EV3Brick.
#!/usr/bin/env pybricks-micropython
from pybricks.hubs import EV3Brick

#Initialisation de l'EV3
ev3 = EV3Brick()
Caractéristiques de l'écran

Tout effacer
💻 mon_ev3.screen.clear()
Description
Efface l'écran
Exemple
#!/usr/bin/env pybricks-micropython
from pybricks.hubs import EV3Brick
from pybricks.tools import wait

#Initialisation de l'EV3
ev3 = EV3Brick()
#Efface l'écran
ev3.screen.clear()
wait(1000)
Écrire du texte
💻 mon_ev3.screen.draw_text(x, y, text, text_color=Color.BLACK, background_color=None)
Description
Effiche un texte à l'emplacement spécifié.
La police utilisée est cette défini par set_font() (voir ci-dessous).
Paramètres
x(int) - Abscisse du côté gauche du texte.y(int) - Ordonnée du haut du texte.text(str) – The text to display.text_color(Color) - Couleur du texte.background_color(Color) - Couleur du fond du texte.
Exemple
#!/usr/bin/env pybricks-micropython
from pybricks.hubs import EV3Brick
from pybricks.tools import wait

#Initialisation de l'EV3
ev3 = EV3Brick()

# Efface l'écran
ev3.screen.clear()

#Écrit le texte
ev3.screen.draw_text(5, 5, "BONJOUR")
wait(3000)
💻 mon_ev3.screen.print(*args, sep='')
Description
Affiche du texte à l'écran comme dans le terminal de commande.
La police utilisée est cette défini par set_font() (voir ci-dessous).
Paramètres
*args- Éléments à afficher.sep(str) - Chaine de caractères qui sera placée entre chaque élément.end(str) - Chaine de caractère qui sera utilisée ne fin de ligne.
💻 mon_ev3.screen.set_font(font)
Description
Définit la police de caractère pour l'affichage d'un texte à l'écran.
Création d'un police
La création d'une police se fait à l'aide de la classe Font qui doit être importée et prend les paramètres suivants :
family(str) - Nom de la policesize(int) - Taille de la police, en générale entre 6 et 24.- ...
Exemple
#!/usr/bin/env pybricks-micropython

from pybricks.hubs import EV3Brick
from pybricks.tools import wait
from pybricks.media.ev3dev import Font

# Création des polices
p1 = Font(size=6)
p2 = Font(size=24)

# Initialisation de l'EV3
ev3 = EV3Brick()

# Affichages
ev3.screen.print('Hello !')
#
ev3.screen.set_font(p1)
ev3.screen.print('Hello !')
#
ev3.screen.set_font(p2)
ev3.screen.print('Hello !')

# Pause
wait(5000)
Afficher une image
💻 mon_ev3.screen.load_image(source)
Description
Eface l'écran puis affiche l'image centrée.
Paramètres
source(strouImage) – Chemin vers l'image ou nom d'une image de la classeImageFile(voir ci-dessous).
Les images prédéfinies de la classe ImageFile
L'EV3 MicroPython propose un ensemble d'images que l'on peut importer :
from pybricks.media.ev3dev import ImageFileListe des images (classées en 4 catégories)
| Information | LEGO | Objets | Yeux |
|---|---|---|---|
| RIGHT | EV3 | TARGET | BOTTOM_RIGHT |
| FORWARD | EV3_ICON | BOTTOM_LEFT | |
| ACCEPT | EVIL | ||
| QUESTION_MARK | CRAZY_2 | ||
| STOP_1 | KNOCKED_OUT | ||
| LEFT | PINCHED_RIGHT | ||
| DECLINE | WINKING | ||
| THUMBS_DOWN | DIZZY | ||
| BACKWARD | DOWN | ||
| NO_GO | TIRED_MIDDLE | ||
| WARNING | MIDDLE_RIGHT | ||
| STOP_2 | SLEEPING | ||
| THUMBS_UP | MIDDLE_LEFT | ||
| TIRED_RIGHT | |||
| PINCHED_LEFT | |||
| PINCHED_MIDDLE | |||
| CRAZY_1 | |||
| NEUTRAL | |||
| AWAKE | |||
| UP | |||
| TIRED_LEFT | |||
| ANGRY |
Exemples
Exemple 1 : Affichage de quelques images prédéfinies
#!/usr/bin/env pybricks-micropython

from pybricks.hubs import EV3Brick
from pybricks.tools import wait
from pybricks.media.ev3dev import ImageFile

# Initialisation de l'EV3
ev3 = EV3Brick()

ev3.screen.load_image(ImageFile.ANGRY)
wait(1000)
ev3.screen.load_image(ImageFile.TIRED_LEFT)
wait(1000)
ev3.screen.load_image(ImageFile.UP)
wait(1000)
ev3.screen.load_image(ImageFile.AWAKE)
wait(1000)
ev3.screen.load_image(ImageFile.NEUTRAL)
wait(1000)
ev3.screen.load_image(ImageFile.CRAZY_1)
wait(1000)
ev3.screen.load_image(ImageFile.DIZZI)
wait(1000)
Exemple 2 : Clignotement d'une image prédéfinie
from pybricks.hubs import EV3Brick
from pybricks.tools import wait
from pybricks.media.ev3dev import ImageFile

# Initialisation de l'EV3
ev3 = EV3Brick()

for _ in range(5):
    ev3.screen.draw_image(10,0,ImageFile.ANGRY)
    wait(400)
    ev3.screen.clear()
    wait(400)